I didn't take pics tonight but I have to share this recipe anyway-- it was SO GOOD and such a perfect fall recipe.
Roast Chicken Fall Style
1 whole chicken
1 bunch fresh thyme
3 parsnips
3 sweet potatoes
3 apples (I used Fuji and Winesap)
Preheat oven to 350.
Cut the fruit and veggies into chunks. Chop a couple of the thyme sprigs (if the stems are woody remove them). Toss fruit and veggies in olive oil, chopped thyme, salt, and pepper. Do this right in your roasting pan or Dutch oven.
Rub the chicken with salt, pepper, olive oil, and a little soft butter. Put it on top of the fruit and veggies. Stuff the rest of the thyme in the cavity of the chicken.
I was lazy tonight so I roasted the chicken breast up for the first half of the cooking time and breast down for the second half instead of doing my typical three turns. It turned out wonderfully, so this might be my new method. Cooking time will depend on how big your chicken is and how cold it is when it goes into the oven. I roasted mine for about an hour and 45 and it was cooked but still really juicy. The apples were incredible with the chicken!
Friday, October 30, 2009
Sunday, September 13, 2009
Mini Cheese and Bacon Souffles

Last night I made these little cheese souffles; I had been at an organic gardening workshop all afternoon (more on that later) so by the time I got home I was pretty hungry and I had two hungry boys to feed too. Maybe souffle sounds intimidating, and I'll be honest, I wouldn't attempt it if I didn't have my trusty KitchenAid mixer to whip the egg whites for me, but if you have some kind of tool to do the hard part they're actually really easy. They're also a great "pantry recipe" and a fun way to turn everyday ingredients into something fancy. I adapted these from an Alice Waters recipe.
Mini Cheese and Bacon Souffles
2 slices of bacon
3 TB butter
3 TB flour
1 cup milk
4 eggs, separated
about 4 ounces cheese
salt and pepper
Preheat oven to 400 degrees. Cut the bacon into little pieces with kitchen shears and cook it in a saucepan until the fat renders. Remove the pieces of bacon with tongs and set aside. In the bacon fat, melt your butter. Cook the flour in the fat and butter mixture for 2 minutes, stirring frequently. Pour in the milk a little at a time, whisking well after each addition, until you've added all the milk. Cook over low heat for about 10 minutes. Don't forget to stir or a skin will form on top.
When the bechamel has finished cooking, remove it from the heat and let it cool for a bit. Stir in the egg yolks and cheese. You can use whatever you like; last night I used Basque Shepherd's cheese from Trader Joe's and it was great. I've also made this with ground Romano and with goat cheese. Whatever floats your boat! Stir in the reserved bacon pieces. Season with salt and pepper; you want the sauce to be just a touch too salty because you'll be folding in the egg whites.
Whip the egg whites in your mixer or by hand if you're awesome. You want them to increase in volume by quite a bit. When they're ready they'll look shiny and have tiny, uniformly sized bubbles. If you still see some big bubbles they aren't whipped enough. When you take out your beater there should be stiff peaks on the top of the eggs. Don't overwhip them either; they will break down if you whip them too much. Just keep your eyes open for tiny bubbles and a pretty, glossy look.
GENTLY fold about half of the egg whites into your cheese sauce. It took me a while to get the hang of this because my instinct is to really really mix everything. You DO NOT want to do this; it'll pop all the tiny bubbles in your egg whites that make the souffle puff. So, gently fold: scoop in some egg white, and with a wooden spoon just push a little sauce over it. Keep going until you've put about half the egg whites in, then fold the egg white/sauce mixture into the remaining egg whites. I do this right into the mixing bowl. The aim is for light and fluffy and airy.
You can cook whole thing in a souffle dish, or if you're pressed for time (as I often am in the evening) you can cook mini souffles in only 10 minutes. I used mini springform pans because I don't have ramekins for the oven, but ramekins would look nicer. If you're cooking the whole thing, pop it in the oven for about 40 minutes. When you pour the souffle mixture into your container of choice be very gentle.
When the souffles are done, they will be puffy and golden and just a tiny bit jiggly in the middle. My little souffles were so puffy last night and started deflating pretty soon after I took them out of the oven; if this happens to you, don't worry, they taste really good either way.
Monday, June 22, 2009
Cappellini with Zucchini and Sausage

This recipe is super easy. All the amounts can be adjusted according to your preferences.
2 or 3 zucchini
2 or 3 fresh chicken or pork Italian sausages
1/2 lb cappellini
Fresh Parmesan
Olive oil
Salt and pepper
Cut the zucchini into bite-sized pieces. Toss with olive oil and salt and pepper on a baking sheet and roast at 400 degrees for about 30 minutes, or until soft and slightly browned underneath.
Cut the sausage into pieces (I use kitchen shears for this) and fry it in a little olive oil in a large pan. Bring a pot of water to boil for the pasta. When the pasta is cooked and drained, toss it in the pan with the sausage. Stir in the cooked zucchini. Dress with a little more olive oil, grate some fresh parm over it, and season with salt and pepper. That's it! My husband loves this dinner and it's so easy-- great for the end of a long day.
Sunday, June 21, 2009
Mushroom Ravioli

I've made this a few times now, and I love love love it. I hope you enjoy it too! It's a lot of work but it's worth it.
Filling:
About 1 lb mixed wild mushrooms, diced
About 1/2 lb fresh ricotta cheese
Chopped fresh flat-leaf parsley
S&P

I used a combination of regular button mushrooms from the store and fresh wild morels and fresh shiitakes. It was delish! Cook the mushrooms in olive oil until they've sweated out their liquid. Set aside to cool. When they're cool, mix in the ricotta, chopped parsley, and salt and pepper to taste. Now you're ready to assemble the ravioli.
Set up a work station for yourself; make sure you have plenty of room. You'll need a small pastry brush and a small bowl of warm water, your ravioli filling, your pasta sheets, something to cut the ravioli with, and a baking sheet dusted with semlolina to put the ravioli on when they're assembled.

Lay out one sheet of pasta. With a teaspoon, put some filling on the sheet. If you're using a long sheet, you might want to put little mounds of filling at intervals. Now brush a little water around the filling, especially at the edges of the pasta sheet. Lay another sheet of pasta on top, pressing to seal. As you seal, make sure you push the air out. Cut the ravioli out with a little rolling crinkle cutter, or with a knife. I've even used a cookie cutter for this. Press the edges to make sure they're sealed and put your finished ravs on the cookie sheet. Repeat until you've used all your pasta or all your filling (preferably both). You'll have a lot of leftover scraps of pasta. Don't throw these away! They're great to throw in soups; they'll keep in the fridge for up to 5 days.


These ravioli need to be cooked very soon after they're assembled or the pasta will get wet and gummy. This isn't something you can make ahead of time, I'm afraid. Boil a big pot of salted water and cook the ravioli in batches. When it floats to the top let it cook about 2 minutes more, then skim out with a spider or slotted spoon. When you're ready to serve, dress with a little olive oil, fresh Parm, and freshly ground pepper. I like to serve this ravioli with cooked greens, partly because I am too lazy to make anything more elaborate once I'm finished with the ravioli.
Wednesday, June 10, 2009
Basic pasta recipe

I wrote my first draft of the mushroom ravioli post a month ago and I just haven't been able to finish it because it's so insanely long. So instead of forcing myself to write a three-page entry about mushroom ravioli that will leave you too exhausted to attempt the recipe, I will break it into parts...and here is part one: the basic pasta recipe.
A confession: you can find a fresh pasta recipe anywhere, but most of the ones I've found are a little too basic. Forgive me if I'm going over familiar territory here. Another confession: making pasta that tastes good requires special equipment, unless you have limitless time and patience for rolling out pasta dough by hand. My husband thought I was crazy to buy the Imperia pasta machine, but I use it like once a week and I think it's just great. The one time I attempted to roll out pasta by hand it took forever and didn't turn out. The other piece of equipment I rely on for this is my KitchenAid mixer; I'm sure you could more easily forgo the mixer than the pasta roller.
4 large eggs
4 cups flour
Olive oil
Salt
4 cups of flour and 4 eggs will make A LOT of pasta: desirable for making ravioli or canneloni, too much if you're just cutting it up into noodles. All that matters is your ratio of one cup flour to one large egg.
Put the flour and eggs in the bowl of your mixer. Add a couple of tablespoons of olive oil and a generous pinch of salt. Mix with the paddle attachment over low speed (1 or 2) until a yellowish dough starts to form. If you're not using a mixer, just use your hands. The dough should be clumpy.
Cover the bowl and let the dough stand for about 15 minutes. This gives gluten time to form, which will give your pasta a nice smoothness. Knead the dough so it's one big nice ball. Divide it into golf-ball-sized balls to put through your pasta machine.
Before you start rolling out your pasta, here are some problems you might encounter and how to fix them. If the pasta is sticking to the machine or your hands, it's too wet so you should sprinkle a little semolina flour on and knead it a bit more. If it's dry and cracking, add a bit of olive oil and knead.
Generously dust a baking sheet with semolina flour. Now for the rolling (I'm assuming you're using the Imperia, if not, please consult the manual for your pasta machine). Put the machine on the widest setting and crank a ball of pasta through it. Fold the now-flattened piece into thirds and run it through again. You'll need to do this about ten times. Then start thinning it out by rolling it through each setting until you get to the thinnest one. Once I've rolled the pasta through the thinnest setting, I like to cut it in half with kitchen shears. Put your pasta on the baking sheet and repeat with the remaining balls of pasta. Make sure that each sheet of pasta has plenty of semolina on both sides before you put another layer of pasta on top of it-- you don't want them to stick!
Now you have fresh pasta. There are lots of variations-- you can add pureed spinach (you'll have to adjust the flour) for spinach pasta, or mix in herbs or spices. I made a saffron pasta once that I really enjoyed. Do whatever you want!
Tuesday, May 26, 2009
Semolina Blueberry Cookies

Somehow time escaped me and I went almost all the way through May only having posted once! Sorry guys, I'll be better from now on. I've been working on an epic post about mushroom ravioli but for now I'll tide us over with a cookie recipe. This recipe was adapted from one I found in Sunset (May 2009) but does not seem to exist online.
About 1/2 cup fresh blueberries
1 1/2 c flour
3/4 c semolina
1/2 tsp salt
1 c unsalted butter, softened
1/2 c powdered sugar
1 large egg
About 2 tbs cornmeal
Combine flour, semolina, and salt. In a large bowl, beat butter and sugar together until smooth. Add egg and mix until combined. Add salt and flours and mix slowly until everything is incorporated. Turn the dough out onto a work surface and shape into a disk, then wrap it in plastic and chill it for at least two hours (and up to two days).
Preheat the oven to 350 degrees. Unwrap the dough and roll it out on a pastry mat or a floured work surface; the dough should be about 1/3 of an inch thick. Sprinkle two baking sheets with cornmeal. Cut the dough with a two-inch cookie cutter and space the cookies slightly apart on the baking sheets. Reroll the scraps as needed (the dough may also need to be chilled again if it's getting sticky).
Bake the cookies for 10 to 12 minutes, or until they're a light golden brown. If you put both cookie sheets in at once, you'll have to swap their positions halfway through cooking. I prefer to do them one sheet at a time; you'll get more even cooking without fussing around with hot cookie sheets. Let the cookies cool on the baking sheet for a couple of minutes before removing them to a wire rack to cool completely.
You might notice that semolina pops up with some regularity as an ingredient in my kitchen; I got started with it when I bought a 3-pound bag of semolina flour at the Armenian market for $1.50 a couple of years ago. Since then I go and replenish every few months. The spices at that market are super cheap too; I love it. I don't know what semolina prices are like at grocery stores. If you can even find it, it's probably expensive, so I'd recommend looking for it at small ethnic markets or in bulk bins.
Monday, May 4, 2009
Spring Vegetable Risotto

I know this kind of looks like the mac and cheese I just posted, but trust me, they're not the same! I was going to wait to post this, but I decided I needed to hustle because these veggies are going out of season. This is a good thing to make on a day when you have some spare time for lengthy kitchen tasks. While I was making this I kept thinking of renaming it "extremely labor-intensive risotto" or "huge pain in the behind risotto" but in the end the hubs and little one and I really enjoyed it, and it definitely gave the beautiful spring veggies a chance to shine.
1 leek
1 artichoke
1 lb. fava beans
1 bunch asparagus
1 1/2 c arborio rice
4 c veggie or chicken stock
1 tb butter
1/4 c dry white wine
salt and pepper, olive oil
Start with the artichoke. Don't bother trimming the leaf tips or trying to make it look pretty-- just steam it until the leaves pull easily from it and the heart can be easily pierced with a knife. In my experience this always takes a loooong time; 45 minutes to an hour depending on the size of the artichoke. When it's done let it cool for a while before you start to pull it apart. Shell the fava beans, then boil them for 2 minutes. Immerse them in cold water until they're cool enough to handle, then pop the beans out of their skins. Be careful or you'll have beans flying all over your kitchen. Set aside your shelled favas.
When your artichoke has cooled, start pulling off the leaves and scrape the "meat" from the bottom of each leaf. I think a grapefruit spoon would work well for this, but since I don't have one I kind of shaved it off with a paring knife. This will take a while so put on some music. When you get there, scoop out the choke and thinly slice the heart.
Clean your asparagus and break off the woody ends. Break the spears into 1-inch pieces. Clean your leek by cutting off the root end and the green top, then cutting it in half lengthwise and immersing it in water. Leeks are grown in sandy soil and if you don't clean them well you could end up chewing on grit, which will ruin any meal. When the leek is clean, thinly slice it. Melt some butter in a pan and cook the leeks, adding the asparagus when the leeks begin to soften. Cook until the asparagus is bright green, then remove from heat and set aside.
Now start your risotto. Heat the stock for four or five minutes in the microwave-- as I've said before, I like to do this right in the measuring cup, and this is especially handy with risotto because you want to add the liquid about half a cup at a time.
Melt a tablespoon of butter in a large, heavy-bottomed pan. I use my Dutch oven for this and it works really well. Cook the rice in the butter until it's coated (only for a minute or two). The ends will be translucent. Pour in the wine and stir. Cook until the liquid is gone. Add half a cup of broth, stir, and cook until it's gone. Repeat until you have about half a cup of broth left. Before you add the last of your broth, taste the rice to see if it's cooked. If it is, stop adding broth. If it's still al dente, add the rest. If you've used all your broth and your rice still isn't cooked, heat up some water in your measuring cup and add it half a cup at a time until your rice is cooked.
When the rice is done, stir in the artichoke, favas, asparagus, and leeks. Grate some cheese over it, salt and pepper it, and you're ready to eat!
Variation: I made this with salmon. I really undercooked a salmon steak, then broke it into pieces and stirred it in. The heat from the rice will finish cooking the fish so you'll end up with nice big pieces of perfectly cooked salmon instead of little tiny pieces of dry salmon.
A tip about risotto: It's important to stir risotto as it's cooking so the rice cooks evenly. I used to think this meant to stir constantly as you were cooking, but that will just give you a gummy risotto. The goal is to have nicely cooked grains of rice with a creamy texture, not a mushy mess. Adding the liquid in small increments, stirring to incorporate it, and then letting it sit for a minute or two is the best technique I've found so far.
Tuesday, April 14, 2009
Mac and Cheese

I was in such a frenzy when I bought the morels last week that I also bought a couple of fresh Oregon truffles; I know it seems insane to buy something like that, but I have whittled down my vices quite a bit in the past few years (having a baby will do that) so I felt I had a little room for an expensive food treat. One of the two truffles was still sitting in my fridge when I decided to make the mac and cheese last night and I figured what the hey, I've heard of truffled mac and cheese so maybe it's good. It was good, really really good, but honestly anything with this much cheese in it will be good so it's no big loss if you skip the truffle.
2 or 3 slices pancetta (optional)
2 tbs butter
3 tbs flour
4 c milk
1 lb fresh mozzarella
about 1/2 lb fresh ricotta
1/4 lb aged white cheddar
pecorino and parmesan to taste
1 lb pasta
1 truffle, chopped (optional!)
Heat the milk for 4 minutes in the microwave. The pancetta, as I've mentioned, is optional. If you're using it, chop it into small pieces and cook it until the fat renders and it's crispy. Reserve 1 tb of the fat and put it in the pot to use in the sauce. Melt the butter with the fat from the pancetta (if you're skipping the pancetta use one more tb of butter) and sprinkle the flour over it, letting it cook for a couple of minutes and whisking so there aren't any lumps. Pour in the hot milk and whisk again, and put the chopped truffle in too. Cook over low heat for about 10 minutes.
Boil the pasta for about two minutes less than the package directions. You want it to be very al dente, otherwise it will get gummy in the oven. Drain it and set it aside.
After your sauce has cooked, remove it from the heat and stir in your cheeses. You can break the mozz and ricotta into pieces; they're too soft to grate and if you have a few lumps that's okay. You can use whatever kind of cheese you want; I was going for an Italian kind of thing, but I included the Irish cheddar so there would be a little more bite-- mozzarella and ricotta are very mild and the saltier cheeses helped perk them up. Reserve some of the grated cheeses for the top. Season the cheese sauce with salt and pepper. Stir in the pasta and bake for about 30 minutes or until it is getting brown on the top.
Varitions: when I don't have a truffle on hand (which is practically always) I use about 1/4 tsp smoked Hungarian paprika in the cheese sauce. It's delish. For a slightly healthier version, use whole grain pasta. Barilla makes a nice whole grain pasta that doesn't taste wheaty and has lots of Omega-3s. To make it even healthier, substitute cooked plain cauliflower for half of the pasta.
Monday, April 13, 2009
Fingerling Potatoes with Mustard and Herbs

I have been getting the most amazing fingerling potatoes at the Santa Monica FM. The names of the different varieties are hilarious; how else can you eat something called Red Thumb alongside something called La Ratte? I love it. This recipe is simple and easy and makes these (already delicious) potatoes taste so good you'll be carb-loading all night.
1 lb fingerling potatoes
About 2 tbs softened unsalted butter
Chopped fresh parsley, summer savory, and dill
About 1 tb whole-grain mustard
salt and pepper
Boil the potatoes until soft and drain well. Toss with butter, mustard, herbs, salt, and pepper to taste. Use more or less of whatever you want!
Grass-fed Bison Brisket

I bought this brisket at the Santa Monica FM; I've been obsessed with grass-fed meats since I read The Omnivore's Dilemma. Anyway, the bison this brisket came from was completely grass-fed, not started on grass and then finished at a feedlot. The result is a nice, lean meat. I didn't know how bison would taste. Would it be gamy? Strong? Stringy? It turned out to be mild and a lot like beef, just a little drier.
1 brisket, about 2 lbs.
1 yellow onion
3 cloves garlic
2 carrots
2 ribs celery
1 bay leaf
2 cloves
2 sprigs thyme
1 c stock
3/4 c wine
Preheat the oven to 300 degrees. Peel the onion and cut it in half. Pin the bay leaf to one half using the cloves. Roughly chop the carrots and celery and peel the garlic. Brown the brisket in a pan-- use something that works both in the oven and on the stove and that has a tight-fitting lid. It should cook for 5 to 7 minutes on each side. When the brisket is browned, remove it to a plate and add a little oil to the pan. Add the vegetables and cook for a few minutes, then add the wine to deglaze the pan. Scrape up all the brown bits at the bottom of the pan-- that's where the flavor is! Add the stock and bring it to a simmer. Put the brisket back in the pan. The liquid should come about halfway up the meat; if there's too little, add some water or more stock. Add the garlic and thyme. Cover the pan and put it in the oven. The brisket will need to cook for about 3 hours total; halfway through the cooking time, flip it over. You should also check about 10 minutes into cooking that your braising liquid isn't simmering too briskly. You only want the gentlest simmer.
Once the brisket is cooked (it should be tender enough to be pierced easily with a fork), take your pan out of the oven. Let the brisket rest in its liquid for about 10 minutes, then remove it with tongs. Remove the vegetables from the liquid with a slotted spoon and discard them-- by now all their flavor will be in the cooking liquid. Put the pan over low heat and simmer to reduce the sauce. This is where a wide, shallow pan comes in handy: the wider it is, the more surface area there is and the quicker your sauce will reduce. Once your sauce has reached the desired consistency, remove the pan from the heat. Carve your brisket and put it in the pan with the sauce, spooning the sauce all over it. Bison has a much lower fat content than beef, and though it will be tender, it will be on the dry side so it will be more delicious if it has a chance to soak up some sauce before serving.
Chicken Pot Pie

Please forgive the photograph-- I promise this pot pie tasted a hundred times better than it looks here. Pot pie is a good way to repurpose your chicken leftovers. Where you might get a little snack out of what's left of your chicken, pot pie lets you stretch it a lot further with the addition of lots of vegetables and a nice buttery crust. My husband liked this so much I suspect he will want to skip the plain roast chicken next time and go straight to the pot pie.
For the crust (adapted from this recipe):
2 sticks cold unsalted butter, cut into 1-inch pieces
2 cups chilled flour
1/2 tsp salt
About 1/2 cup chilled water
Make sure all of these ingredients are cold! Chilling is the key to success with pastry crust. Start this well ahead of time, because when the crust is assembled it will need to chill in the refrigerator for about 3 hours. Put your butter on a clean work surface. You'll need plenty of room. Dump the flour and salt over the butter, then begin cutting the flour and butter together with a pastry cutter or a fork. I used my bench scraper and it worked really well. Once the butter and flour are blended (it should look like coarse cornmeal, with some pea-sized pieces of butter) add the water a little at a time and mix with your scraper or a knife. You should have something that looks like a crumbly dough at this point.
Push the dough aside and dust your work surface with flour, or put down a pastry mat. I use my Silpat for this and it's amazing. Start rolling out your dough on the mat. Feel free to dust your rolling pin with flour at any time if your dough is sticking. Try to make it rectangular. Fold the short sides in so they meet in the middle, then fold the whole thing in half lengthwise. Turn it 90 degrees, roll it out again, and repeat the folding process. Put the dough in a Ziploc bag or a Tupperware and put it in the fridge for 15 minutes. Take it out again and repeat the roll-and-fold two more times. Put the dough back in the bag and back into the fridge for at least 2 hours (and up to overnight). Now you can make the filling for your pie.
For the filling:
1 or 2 tbs olive oil
1 leek, cleaned and sliced
1 bulb fennel, diced
3 carrots, sliced
2 ribs celery, sliced
1 cup sliced mushrooms
1 cup peas; if you're using frozen peas, thaw them out
For the sauce:
2 tbs butter
1 tb of the brown jelly from the chicken (not the fat, which is yellow)
2 tbs flour
2 1/2 c milk
Preheat the oven to 350. Heat the olive oil in a Dutch oven, and put in the leeks, fennel, carrots, celery, and mushrooms. Cook over medium-low heat. While these are cooking, take all the remaining meat off your chicken and set it aside in a bowl. Save the chicken carcass for stock. Check on your veggies. When they're getting soft (remember they'll continue to cook in the oven), take them off the heat and stir in the thawed peas and chicken meat.
Heat the milk in your measuring cup in the microwave for two minutes. In a saucepan, melt the butter and chicken jelly and sprinkle the flour over it. Let this cook for a couple of minutes. Pour the milk into the saucepan and whisk your mixture. Cook over low heat (you should bring it to a gentle simmer) until it thickens. Whisk it often so it doesn't have any lumps. Pour the sauce over the chicken and veggies, stir, and season with salt and pepper.
Once the dough has chilled, take it out and let it rest on the counter for about 10 minutes to take the chill off, otherwise it'll be impossible to roll. Roll the dough to about 1/8 of an inch thick and try to make it the right shape for your pie. Put the crust over your pie, tucking in the edges, and cut a few slashes in it to let the steam out while it bakes.
Put the pie in the oven and bake for 25 to 30 minutes, or until the crust is puffed and golden.
This recipe is easy to modify: you can make it vegetarian by leaving out the chicken (obviously) and using a vegetable bouillon cube in the sauce. Just mash the bouillon cube up with the butter (a trick I learned from Nigella. Thanks, Nigella!) and then proceed with the flour and milk. You can also use whatever vegetables you like; my personal opinion is that pot pie isn't pot pie without carrots and peas, but if you want to put something else in there, have at it.
Sunday, April 12, 2009
Blueberry Walnut Waffles

My husband usually gets me books or things to wear for Christmas; he (rightly) thinks Christmas is a time for gifts that don't tend toward the practical. So you might think the waffle iron I got for Christmas wasn't very romantic, but boy would you be wrong. I LOVE waffles. Every time I see them on a menu I'm thrilled. When I see them on TV I say, "waaaaaaffffffllllleessssss." So he knew I'd be excited about a waffle iron. He used to say he didn't even like waffles (blasphemy!) but I've brought him over with this recipe. It's a variation on the Classic Belgian Waffle recipe that came with my waffle iron (Villaware Round Belgian Waffler).
4 eggs, separated, room temperature
1 tb sugar
1/4 c butter, room temperature
1 c buttermilk (you can use regular milk instead, but I love buttermilk for baking)
1 tsp. vanilla
1/4 c spelt flour
1 3/4 c all-purpose flour
2 tsp baking powder
1/2 tsp salt
1/4 or 1/2 c fresh blueberries
1/2 c raw walnuts
Cream the butter and sugar. Add the egg yolks and mix well. Add the milk and vanilla, then the flour, salt, and baking powder. Mix only until there are no lumps. Beat the egg whites until stiff peaks form, then gently fold the egg whites into the batter. Stir in your blueberries and walnuts and fire up your waffle iron.
I've experimented with different proportions of spelt and white flour, and this seems to be the best balance. The waffles get a bit heavy if there's too much spelt, but you can still taste it even when you only use 1/4 cup of it. Spelt has a nice sweetness that complements the walnuts. When I bake walnut bread I always use a little spelt flour.
Roast Chicken

I love to make this; it makes the whole house smell good and we usually have enough leftovers to make a few chicken meals. To make it a one-pot meal, I like to put vegetables in the pan with the chicken while it's roasting, but this time I just cooked the chicken all by itself. I bought this chicken at the Hollywood FM-- I always try to get free-range, organic, hormone-free chickens. One last word of advice: give yourself plenty of time to cook this. If you start when you're already hungry you'll be camped out in front of your stove with the thermometer in your hand, and you'll make the whole thing take longer because you'll be opening the oven every five minutes hoping that the chicken is done.
1 whole chicken
1 lemon
1 bunch fresh rosemary (thyme also works well)
3 cloves garlic, thinly sliced
3 or 4 tbs olive oil or softened butter
salt and pepper
The day before cooking, rinse the chicken and pat it dry with paper towels, then put salt and pepper all over it and put it in the fridge. Salting the chicken ahead of time makes it more juicy. Save the little bag of gizzards to use in chicken stock. About an hour before cooking, take the chicken out of the refrigerator to take the chill off. Preheat your oven to 400 degrees.
Put your chicken in a roasting pan. Any shallow, oven-proof pan will do, as long as it's big enough to accommodate your chicken. Stuff the chicken with fresh rosemary and don't be afraid to use a lot. You can't really overdo it. Slide a few of the slices of garlic under the skin on the breast-- this part is kind of gross but it makes the chicken taste really good. Put the rest of the garlic in the cavity. Cut your lemon in half and squeeze it over the chicken, then put the halves in the cavity. Rub the chicken with olive oil or butter and then salt it again.
Roast the chicken breast side up for 20 minutes, then lower the oven temperature to 350 and flip the chicken over to roast it breast side down for 20 minutes. Turn it over so the breast is up and continue roasting until it's done. The chicken will look nicely browned. I start checking the temperature after an hour of total cooking time. Use a meat thermometer in the thickest part of the thigh, away from the bone. When it reads 165 or 170 degrees, take the chicken out and let it rest for 15 minutes or so before carving. The juices and drippings at the bottom of the pan will be really delicious with your chicken. Try to skim off the fat and save the brown pan drippings. You can make gravy, but I usually don't bother doing that because by the time the chicken is done I'm so hungry I can't wait. Once your chicken has rested, carve it and spoon some juices over it and enjoy!
Friday, April 10, 2009
Semolina Flatbreads

I make these all the time. The bread part is adapted from a recipe I found in Sunset. I don't think I've ever made these with their intended topping but I'm sure they're delicious that way.
Semolina Flatbreads
1 package active dry yeast
2 cups all-purpose flour
1 cup semolina flour
2 tsps salt
Put one cup of water in a microwave-safe container (I like to use my measuring cup) and heat it for about 30 seconds, or until it is warm. You need it hotter than room temperature but not too hot because you're using it to proof your yeast. 100 degrees is ideal. It'll feel warm when you stick your finger in but not so hot you'll burn yourself. Put the yeast in the water and let it stand for about 5 minutes, or until it looks foamy.
Meanwhile, mix the flours and salt in a big bowl. When the yeast is ready, pour it in and stir. The mixture may seem dry; knead the dough lightly a couple of times to incorporate more flour. The dough will seem stiff and if you make a lot of bread it will look way too dry. Don't worry about it, just cover it and let it rise in a warm place for about an hour or until it's risen to about 1 1/2 times its original size. When you have 15 or 20 minutes to go, preheat your oven to 450.

Now make some toppings! You can use whatever you want. My favorite is a mushroom and onion topping. I had some fresh shiitakes and trompettes on hand last night, so I cut those up along with some button mushrooms. I like to slice the onion thinly so I have long, skinny pieces, then I melt some butter and cook the onion until it's very soft and brown before I add the mushrooms. When I add the mushrooms to the pan I toss them a few times so they can soak up the butter or oil, then I let them sit while they cook. If you stir them too much while they are cooking, mushrooms can get rubbery. Letting them sit allows the ones on the bottom to brown. Add salt and pepper early in the cooking. The salt will help draw out the moisture.
When your hour is up and you've prepped all your toppings, get your dough ready. Knead it until it's smooth, then use a bench scraper or a knife to cut it into 16 pieces. Roll the pieces into balls and then roll them into little rounds with a rolling pin. Throw some toppings on! Last night I put mushies on half of them, topped those with cheese, and put chopped fresh dill and aged cheddar on the other half.
Once they're all rolled out and topped, bake them for 10 to 12 minutes, or until they're puffed and golden and the cheese is melted and bubbling.
Purple Sprouting Broccoli

I first tried this when it turned up in my delivery box from Auntie Em's. I loved it so I bought more when I saw it at the FM this week. Uncooked, it has a much stronger smell than regular broccoli and a pretty purplish color. I'm not a fan of steaming broccoli; you get uneven results (the pieces on the steamer basket get overcooked while the ones on top are raw). Parboiling gives you good color and even cooking. Contrary to popular lore, you are not going to boil out all the nutrients unless you boil your veggies until they're a soggy mess. I boil a big pot of water and put the broccoli in for two or three minutes (until it's bright green), then drain it well. After that I heat up a pan with some olive oil and stir-fry it for a couple of minutes. All it needs is a bit of crushed red pepper and some salt. Last night I added some crumbled bacon. Pancetta also works nicely with broccoli. You can leave the meat out, of course.
Wednesday, April 8, 2009
Lavender

My tips for growing lavender:
Dig out a little island in the sea of weeds you call a yard. Buy 3 varieties of lavender in 3" containers. Plant them too close together. Get pregnant during the summer and nap instead of watering your lavender. Fret that you've killed the lavender while your husband grumbles about that big dead spot where you planted it. Notice some green when it starts to rain again. Continue ignoring it anyway. Notice with amazement two years after you planted it and ignored it that your lavender is doing extremely well and has reached 20 times its size at purchase. Put lavender in vases all over the house, possibly increasing relaxation through aromatherapy which may lead to more plant neglect.

Seriously guys, I have a LOT of lavender. Does anyone need a sachet? Dried lavender? Lavender salt?
Asparagus and Morel Quiche

I nearly passed out from excitement when I saw morels at the FM today. I've been waiting ages for them to come into season. Lucky day! I bought almost a pound of them.
Next on my list was asparagus. It's at its best this time of year and it goes very well with morels. You can see my excitement about the morels hadn't worn off by the time I picked up the asparagus.

All the ingredients for the filling were purchased at the FM today. The cheese is traditional chevre from Redwood Hill Farm and I can't recommend it enough. And their website has incredibly cute pictures of goats, so you should go look at them. For the crust I follow Martha Stewart's pate brisee recipe.
For the filling:
About 1/2 lb. fresh morels, cleaned and sliced
1 bunch asparagus, hard ends discarded, broken into 1-inch pieces
1 shallot, minced
4 large eggs
1 cup cream
8 oz. chevre
4 or 5 leaves fresh tarragon, chopped finely
2 tbs. butter
Salt and pepper
Preheat oven to 350 degrees. Melt the butter in a large pan, then add the shallots. Cook shallots until they begin to look translucent and are browning at the edges. Add mushrooms. Cook until mushrooms begin to sweat, then add asparagus and cook until asparagus is bright green and getting tender. Remove from heat. Season to taste.
In a large bowl, whisk together eggs, cream, and tarragon.
Roll out your dough and put it in a 9-inch pie plate. Spoon the mushroom mixture into the dough and break the chevre into pieces over it. Pour the egg mixture over the top. Bake for 35-40 minutes, or until the quiche is puffy and golden and a knife inserted into the center comes out clean. Let cool for 10 minutes before cutting. Show it to your baby, who will consider eating it all or at least mashing it all in his hair.

I messed up the crust tonight; it tasted fine but looked awful. The quiche was amazing though! The ingredients were so fresh and tasty. I love spring. If you can't find morels, just sub regular button mushrooms or chanterelles.

Fava Bean Caprese Salad

Fava beans have been all over the FM for the past couple of weeks and I finally broke down and bought some today. The last time I cooked favas the recipe was a total disaster; I think I neglected to take the skins off the beans or something and for a while every time I mentioned fava beans my husband would shudder and make the disgusted noise he usually reserves for quinoa.
Have I mentioned that fava beans are a total pain in the ass? First you have to shell them, then you boil them for two minutes, then give them an ice-water bath until they cool, then you pop them out of their skins. You go from having a giant bagful of beans and thinking, "What will I do with all these fava beans!" to having half a cup of them after almost an hour of work. To make all the prep less boring sometimes I pretend I'm a farm wife, shelling beans on the frontier or whatever.
A couple of weekends ago Neela and I had lunch at Joan's on Third, where I saw a beautiful fava bean and fresh mozzarella salad in the deli case. I really wanted to try it, but our cheese plate and flatbreads cost $30 so I decided to skip it. I should have sampled it when I had the chance, but instead I just worked off of what it looked like to make a little spring salad for tonight. I bought heirloom tomatoes and fresh mozzarella at the FM today. The basil and parsley came from my garden. This is less a recipe and more a list of what I used.
1 medium yellow tomato
4 small tomatoes (they looked like Romas, but were the color of brandywines. Ideas anyone?)
About half a cup of boiled and shelled fava beans
1 lb fresh mozzarella, small balls
A few sprigs of parsley
A few basil leaves
Olive oil, vinegar, salt, and pepper
Chop the tomatoes, removing seeds and pulp. Chop the herbs. Put everything in a bowl, dress, season, mix and chill.
Sean loved this salad. He asked what the beans were and when I told him he said, "Wow, I do like fava beans!" Win. Kieran liked the favas but not the tomatoes. Partial win.
Wednesday, April 1, 2009
Beet and Kumquat Salad

My husband said this picture looked like guts, but then he added, "But it tastes really good!" So there you go: this is a salad that kind of looks like guts, but is delicious. Even Kieran liked it! He had beet juice all over his face and Sean said he looked like a zombie. This recipe is adapted from one I picked up at the Schaner Farms booth at the Santa Monica FM.
Beet and Kumquat Salad
1 ripe avocado
1 bunch beets
1 cup kumquats
about 1/2 small red onion
olive oil
Champagne vinegar
lemon juice
salt and pepper
Peel and wash the beets. Trim the greens off and save them, or steam them and serve them with your dinner. Cut the beets into small cubes and boil or roast them until they're soft. Cut the avocado into small cubes and squeeze some lemon over it to prevent discoloration. Mince the onion and slice the kumquats. Mix the vegetables together, dress with olive oil, vinegar, salt, pepper, and lemon juice to taste. This salad tastes best if made ahead and then chilled for at least a few hours.
Spring Gardening
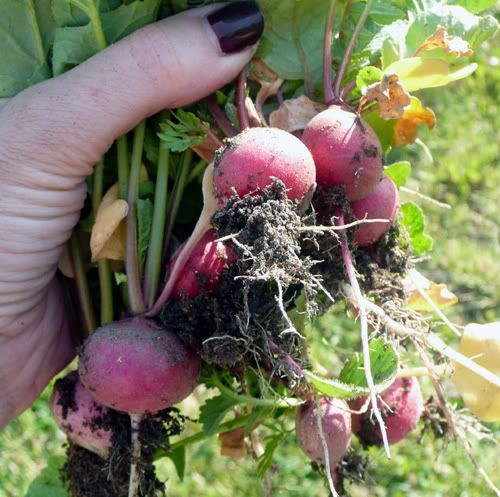
My big dreams for a garden in the backyard were thwarted for a bit when I got pregnant (and huge and lazy) and then was holed up taking care of a newborn. Getting outside and digging in the dirt seems like a monumental task when you're only sleeping 2 hours a night. But now that Kieran is 1 and I'm getting the hang of the whole mom thing, I've been taking advantage of the beautiful weather and spending some time in my veggie garden. I figured it would be a good idea to ease back into it with a few things that are easy to plant and grow. 'Rainbow Bright Lights' chard is one of my favorite garden veggies-- it requires very little attention and doesn't seem to attract aphids the way mustard greens and collards do, and starting it from seed is easy. I love to plant radishes and carrots together-- the radishes will be ready first, and as you pull them up the carrot seedlings get more sun and the soil is aerated. Lettuce is easy too, and I just snip leaves here and there to make little salads.
Here are my radishes! (AKA best ways to ruin a manicure)
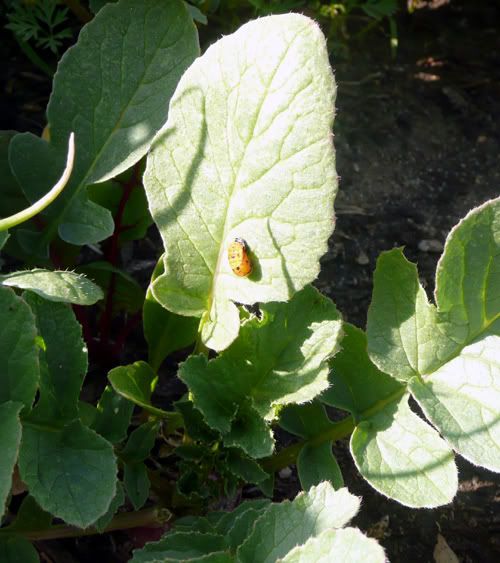
I like it when I find little critters on my veggies, as long as they're good little critters. This is a late-instar ladybird beetle larva. For all of you non-entomologists, that's like an adolescent ladybug. They're voracious predators of aphids and other pest insects, and I'm glad to have them around.
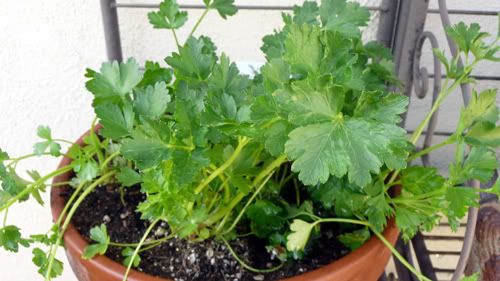
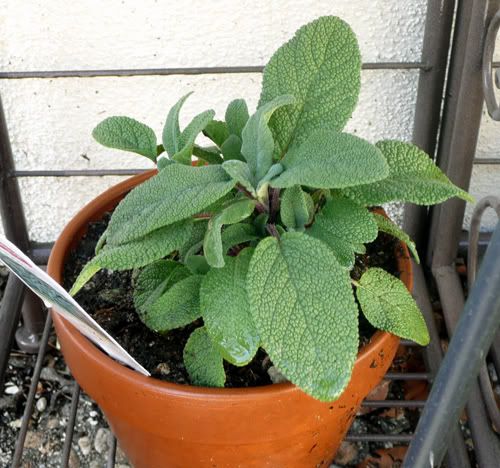
I also potted some herbs today: basil, summer savory, French thyme, and these guys:
English Mint
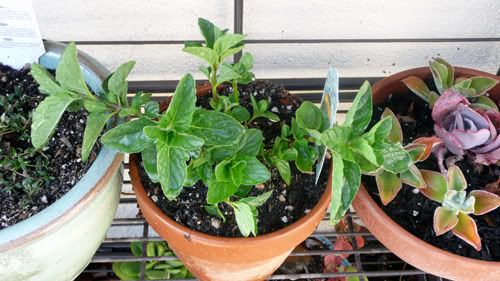
Italian flat-leaf parsley
Sage
Here are my radishes! (AKA best ways to ruin a manicure)

I like it when I find little critters on my veggies, as long as they're good little critters. This is a late-instar ladybird beetle larva. For all of you non-entomologists, that's like an adolescent ladybug. They're voracious predators of aphids and other pest insects, and I'm glad to have them around.

I also potted some herbs today: basil, summer savory, French thyme, and these guys:


Tuesday, March 31, 2009
Turkey Burgers
Once a month I get a delivery of fresh, organic produce from Auntie Em's Kitchen. I love going to the FM myself, but I look forward to these deliveries because they're always full of surprises and things I wouldn't ordinarily choose for myself. Yesterday my delivery contained some gorgeous collard greens and some beautiful yellow fingerling potatoes. I pulled them to go with our dinner last night.
Turkey Burgers, Collard Greens, Oven Fries
Turkey Burgers
About 1lb. ground turkey
1 carrot, grated
fresh thyme OR fresh chives, chopped finely
1 very small shallot, minced finely
1 clove garlic, minced finely
1 tablespoon Bragg's liquid aminos
salt and pepper
Mix all the ingredients together with your hands until everything is evenly distributed. Make into patties that look slightly too large for the buns you intend to use-- the patties will shrink when you cook them. Heat a bit of oil in a skillet. When the skillet is hot, toss a couple of patties in and cook on the first side for 4 minutes or so, until they're browned, then flip and cook on the other side until they're cooked through. How long this takes depends on how hot your skillet is and how thick your patties are, so just use a thermometer to check (180 degrees means they're cooked), or discreetly cut into the middle to make sure it's not pink. If you want to put cheese on your burger just slice it and put it on the browned side while the other side is cooking, or put the patties under the broiler after they're browned until the cheese melts. You might want to leave them slightly undercooked if you're going to put them in the broiler, otherwise they'll dry out.
This recipe is very adaptable. Last night, instead of the shallot and garlic, I used 2 stalks of green garlic chopped finely and it worked beautifully. And I learned the hard way not to use the large side of the box grater to grate the carrot; you don't want the carrot pieces to be too big because that will make it hard to form the patties. Also, a whole carrot may be too much carrot for you. Sometimes I just get lazy and grate half the carrot and then eat the rest. As for the herbs, the type and amount is totally up to you. I really love thyme with turkey, but as the weather warms up thyme just doesn't seem appropriate. Chives are nice with the other alliums in this recipe, but I am not a fan of soft, green herbs with harder winter herbs, which is why I don't recommend using them together.
A tip about ground turkey: Do NOT get fat free or 99% fat free! Turkey breast is quite lean, and a lot of the fat cooks out. If you get meat that's too near fat-free you won't enjoy it at all because it will taste like cardboard.
Collard Greens
This part is so easy it's barely a recipe, and it works for all kinds of leafy greens.
1 bunch collard greens
Roughly chop the collards and put them in a big bowl of cold water. Swish them around a bit, change the water, then lift them out of the bowl and put them into a big pot with a lid. There will be enough water on the leaves to steam them in the pot. Put the heat on low and cover the pot; cook until the greens are wilted. Dress them with a little olive oil or butter if you like, but when greens are in season they have plenty of flavor on their own and are so good for you. If there are fats and oils in other parts of your meal, plain cooked greens are a nice counterpoint.
Oven fries
10 fingerling potatoes
Preheat oven to 425. Cut the potatoes lengthwise into quarters. Toss them with olive oil, salt, and pepper. Generously grease a baking sheet with olive oil, spread the potatoes in a layer, and bake for about 20 minutes, or until the potatoes begin to look crisp and are very soft inside.
Subscribe to:
Posts (Atom)